Sunken wheel tracks, a dip that holds water, pavers that rock underfoot: when block paving sinks, something underneath has moved. The Concrete Manufacturers Association’s design guide puts settlement down to “an inadequate subbase or subgrade, the presence of subsoil water, overloading the pavement or a bedding sand layer which is too thick” [1].
Where we stand: paving is our trade, and lifting and relaying sunken paving is work we quote across Cape Town. The CMA is a concrete manufacturers’ body writing about its own product, so we quote its guidance and say where the view is ours.
The short version
- Something below the surface has given way. Book 2 names the subbase or subgrade, subsoil water, overloading or too thick a bedding layer [1].
- The fix is a lift-and-relay. Lift the area, address the problem, reinstate the level and re-lay the pavers [1].
- Bedding sand is not a leveller. Hollows in the subbase are filled with compacted subbase material, never bedding sand [2].
- Full joints matter. Book 3 calls fully filled joints essential to the pavement’s full structural performance [2].
- No per-square-metre figure. We price a repair after seeing what is underneath.
What makes block paving sink?
Book 2 lists four causes of settlement: an inadequate subbase or subgrade, subsoil water, overloading, or a bedding sand layer that is too thick [1]. A faulty paver is not on the list.
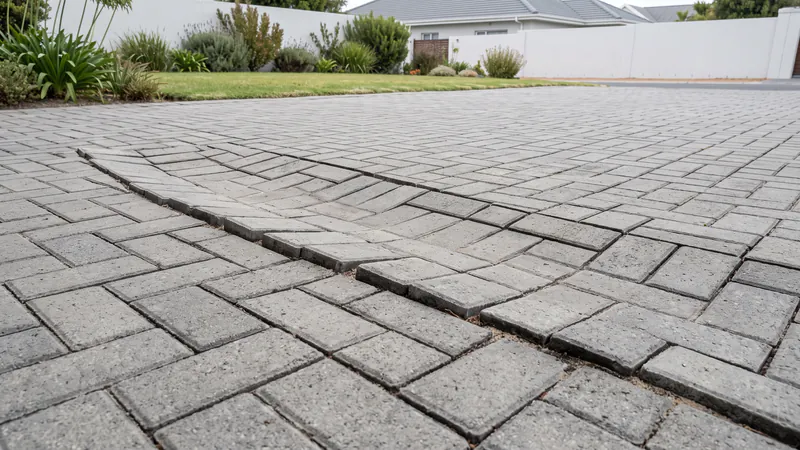
- The subbase or subgrade: the compacted layers the sand and pavers sit on. If they give, the surface follows.
- Subsoil water: water in the ground under the paving. On drainage generally, Book 2 says “Most failures of pavements are due to ingress of water into the pavement layerwork” [1].
- Overloading: more load than the paving was built for. Book 2 says 50 to 60mm blocks are generally adequate for domestic use and recommends 80mm for industrial use [1].
- Too much bedding sand: the layer is meant to be thin, for the reason in the next section.
More on each layer in our guide to what makes paving fail early.
The bedding-sand shortcut that shows up later
Bedding sand is a thin layer, 25mm ±10mm after compaction, there to bed the pavers evenly [1]. The CMA says it must not be used to fill hollows in the layer below.
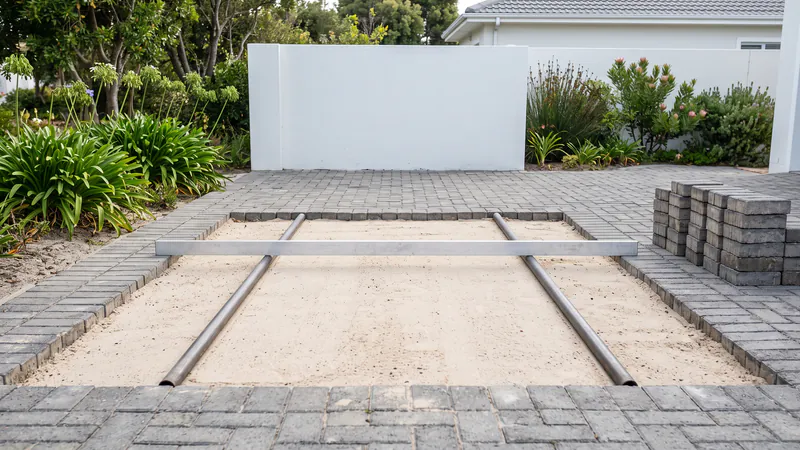
Book 2 says the bedding layer “should not be used as a levelling course to fill voids in the subbase surface. This will lead to subsequent settlement” [1]. Book 3 says depressions are filled with subbase-quality material compacted to 98% of modified AASHTO maximum density, and “Bedding sand shall not, under any circumstances, be used for this purpose” [2].
A hollow filled with extra sand can look flat on hand-over day, so know what to check before you pay the contractor.
Edges that let the paving creep
Book 2 says “All cbp must have an edge restraint” [1]. Without one, the pavers at the edge can creep outwards and the joints open.
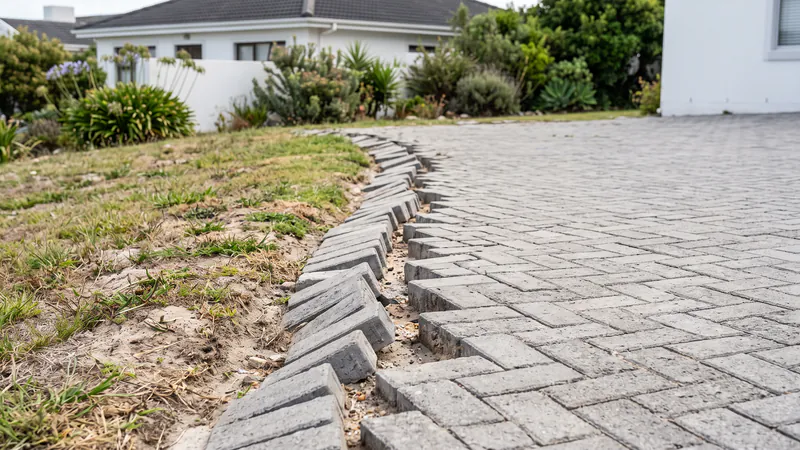
- What it does: Book 3 says the edge restraint retains the sand bedding and ensures edge units “do not creep outwards or rotate under load with consequent opening of joints and loss of interlock” [2].
- What counts: cast in situ, precast, or an existing structure [1].
- When none is needed: Book 3 says a separate restraint is unnecessary where the paving joins an existing concrete pavement, or asphalt at least 100mm thick [2].
In our view, if the edge has moved, relaying the field without repairing the edge leaves the same weakness in place.
Water, and the ground under Cape Town paving
Water getting into the layers is the CMA’s leading failure cause [1], so a dip that holds water after rain is worth watching. The ground itself also varies a lot across the Cape Flats [3].
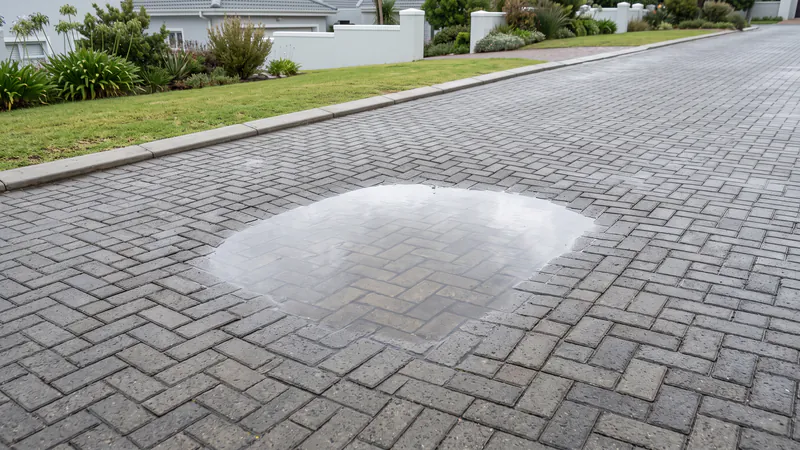
- Falls: Book 2 says “Adequate longitudinal falls and no undulations are necessary to prevent ponding and infiltration of water into the layer-works”, with a minimum fall of 2% in any direction generally required [1].
- At drains: paving is laid 5 to 10mm proud of stormwater structures or channels [1].
- Slopes and high water tables: water can collect in the bedding sand at the low point of a slope, and subsoil drainage should go in where the water table is high [1].
- The ground: a geotechnical study found Cape Flats sands “highly variable (with both inter- and intra-formation variation), with a wide range in many material properties” [3]. In our view, that is why a base has to suit the site.
If your property has its own stormwater drains, keeping them working is on you: the City’s by-law says every owner of property on which private stormwater systems are located shall “at own cost, keep such stormwater systems functioning effectively”, unless the City has taken that on in a maintenance agreement or a servitude condition [4]. We also look at whether permeable paving is worth it in Cape Town.
Relay or rebuild? What a lift-and-relay involves
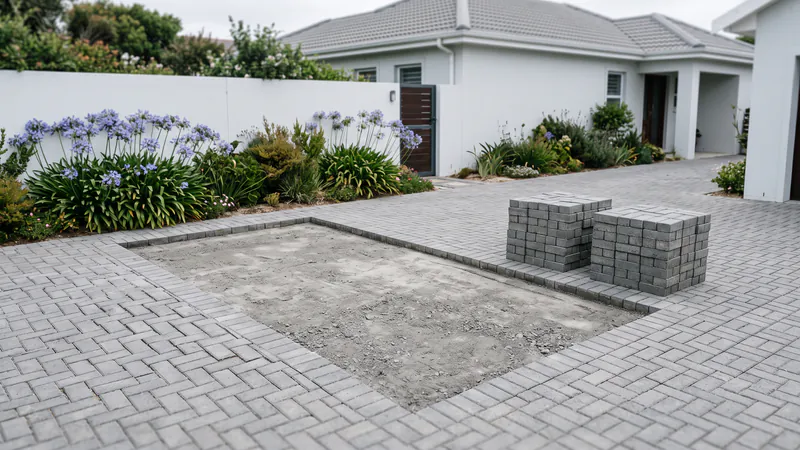
Book 2’s fix for settlement is to lift the area, address the problem, reinstate the level and re-lay the pavers [1]. How deep that goes is what an inspection finds out.
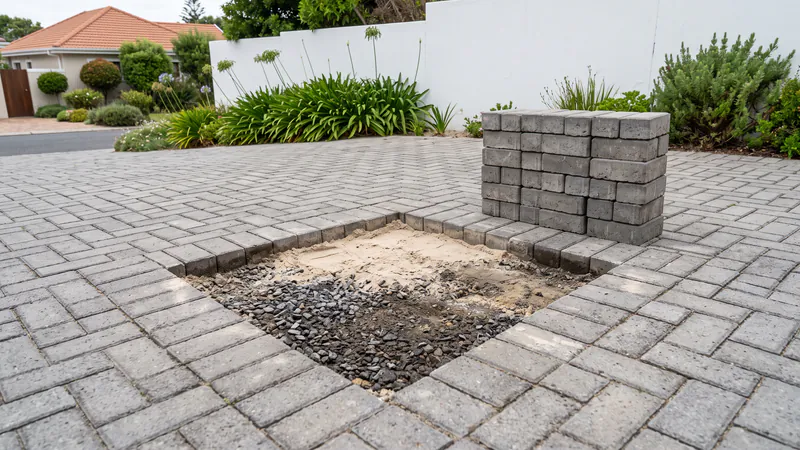
We lift a few pavers at the worst point and look at the layers before we quote, as we do for the other paving work we take on. In our view, a relay quoted without looking underneath is a guess.
- Lift the affected pavers and stack them for reuse.
- Fix the cause: whatever failed underneath, whether the base, the drainage or the edge.
- Screed a loose sand bed to reach 25mm ±10mm once compacted [2].
- Relay and cut in: Book 3 names guillotine block cutters or power saws, and does not recommend cut pieces smaller than about 25% of a full paver [2].
- Compact and joint: at least two compactor passes, then jointing sand broomed in and compacted, repeated “until the joints remain full after compaction” [2].
A lift-and-relay suits
- A sunken area with sound paving around it
- A local defect: Book 2 says that where defects occur locally, repairs “are not usually difficult, time consuming or costly” [1]
- Pavers that come up whole and can go back down
Look at more than a relay when
- The sinking runs across the whole area, not in patches
- The edge restraint or the drainage has failed as well
- You were planning a new driveway anyway
A check you can do: Book 3 limits the level difference between adjacent pavers to 3mm, on finished paving three months after opening to traffic, for its Degree of Accuracy I [2]. A bigger step is worth pointing out at the assessment.
What drives the cost, and why we publish no rate
We don’t publish a per-square-metre figure for relaying, because the rate depends on how deep the base has to be rebuilt and whether pavers need replacing. What moves the price most is what sits under the surface.
- Depth of the repair: resetting the sand bed is one job; digging out and rebuilding the base is a bigger one.
- Pavers that break on lifting: in our view, expect some to need replacing, and matching older stock can be the hard part. Our comparison of charcoal cobble, clay and granite pavers covers the materials.
- Edges and drainage: if either caused it, the repair includes them.
- Access: how easily material can be moved in and out.
For what goes into pricing new paving, see what drives a Cape Town paving quote.
When topping up the joints is enough
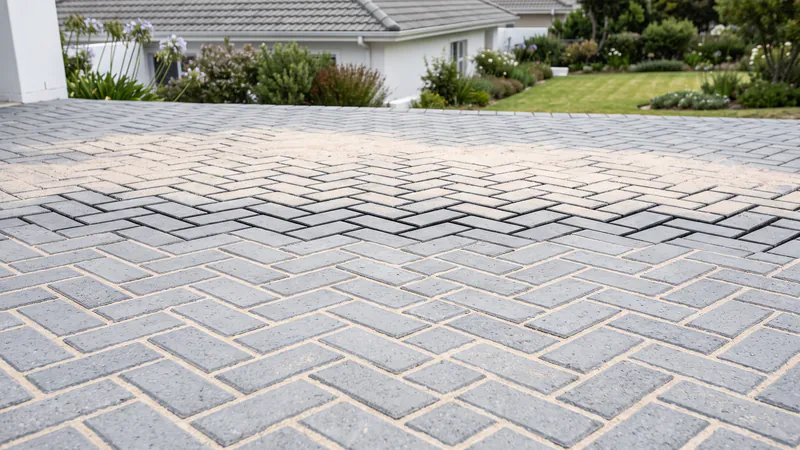
If the surface is still flat but the joints have dropped, in our view refilling them may be all it needs. Use a fine jointing sand, not bedding sand [1].
Do
- Use a finer sand: “Coarse river sand is ideal for bedding, while a finer plaster sand is necessary for jointing” [1]
- Top up when required, “typically three months after construction” [1]
- Brush the sand in: Book 3 says it “should be brushed and not washed into the joints” [2]
Watch out for
- Cement in the jointing sand: Book 2 says it “will lead to cracking and subsequent water ingress” [1]. The exception is a little cement right around a downpipe or stormwater outlet [1]
- Polymeric jointing products: they are sold, but Book 2 mentions specialised polymers only for sealing airport joints. If you use one, follow its own data sheet
Our routine for looking after block paving covers joints, weeds and drains.
Which repair, in our view
- Flat surface, low joints: top up with fine jointing sand.
- A sunken patch or rocking pavers: lift, fix what is underneath, relay.
- Edge pavers moving outwards: repair the edge restraint as part of the relay.
- Water standing after rain: check the falls and outlets before anything is relaid.
- Sinking across the whole area: get the layers assessed before choosing between a relay and a new driveway.
Common Questions
Can sunken paving be fixed without replacing the pavers?
Often, yes. Book 2’s fix for settlement is to lift the area, address the problem, reinstate the level and re-lay the pavers [1]. In our view, expect a few to crack on lifting and need matching replacements.
Does relaying cost more than laying a new driveway?
It depends on how much of the base has to be rebuilt. Book 2 says local repairs “are not usually difficult, time consuming or costly” [1]; sinking across the whole area is effectively a new install. We price it after an inspection.
Why did only one section of my driveway sink?
Book 2’s causes of settlement include a weak subbase or subgrade, subsoil water, overloading and a bedding layer that is too thick [1]. In our view, any of these can affect a single area. Book 2 warns that bedding sand used to fill hollows in the subbase leads to settlement [1], and Book 3 forbids it outright [2]. Opening up that spot is how to tell which.
How do I know if it is the base or just the joints?
In our view, a flat surface with low or empty joints is a jointing problem, and topping up may be enough. A surface that has dropped, rocks underfoot or has ruts points to the layers underneath, and lifting a few pavers at the worst point shows which.
Will pressure-washing my paving cause damage?
It can empty the joints: in our view, a jet aimed into them will blow the sand out. Keep it gentle and sweep fresh jointing sand in afterwards; Book 3 describes jointing sand as brushed in, not washed in [2].
How much fall should a driveway have?
Book 2 says a minimum fall of 2% in any direction is generally required, with paving laid 5 to 10mm proud of stormwater structures or channels [1]. It adds that adequate falls and no undulations are necessary to prevent ponding and water getting into the layers, particularly in the early life of the pavement [1].
Paving sinking, rocking or holding water? We do free on-site assessments across the Peninsula: we show you what is going on underneath and follow with a written quote, with no obligation to use us for the work. See how we work out a price, or call 021 825 6396, weekdays 8am to 5pm.
Sources
- Concrete Manufacturers Association — Concrete Block Paving, Book 2: Design Aspects (bedding sand, sec 2.3; block thickness, sec 2.4; jointing sand, sec 2.5; edge restraints, sec 2.6; drainage, sec 2.7; local repairs, sec 4.2; settlement, sec 6.4). cma.org.za (PDF)
- Concrete Manufacturers Association — Concrete Block Paving, Book 3: Specification and Installation (depressions, sec 5.1.1.2; edge restraints, sec 5.2; sand bed, sec 5.3; cutting and compaction, secs 5.5–5.6; joint filling, sec 5.7; permissible deviations, sec 6.2). cma.org.za (PDF)
- Fouché, N & Day, P W — “Geotechnical properties of Cape Flats sands”, Journal of the South African Institution of Civil Engineering, Vol 64 No 2, 2022. scielo.org.za
- City of Cape Town — Stormwater Management By-law, 2005 (s8(1): stormwater systems on private land). openbylaws.org.za